This help document has been updated for version 38.6.0 on 3/9/2016
For increased security
For increased security, always choose SSL/TLS connections.
POP vs IMAP?
If you would like to learn more about the differences between Post Office Protocol (POP) and Internet Message Access Protocol (IMAP), see the help topic, POP vs. IMAP.
What type of setup are you doing?
- Initial install & setup
- Existing install configuration (POP3)
- Existing install configuration (IMAP)
- Modifying account to remove old messages off server.
Initial Install
- Download the latest version at https://www.mozilla.org/en-US/thunderbird/ and run the install
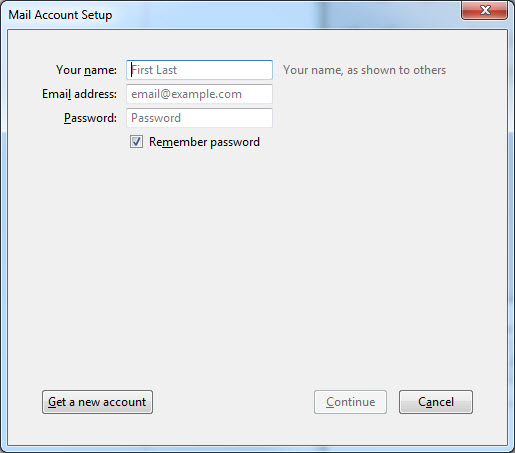
- The first screen that comes up is the window. Fill in your name, email address, and password. Choose
.
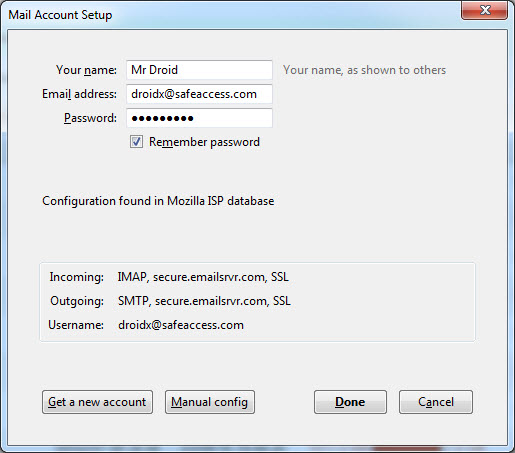
- Thunderbird will automatically configure the correct settings for your account defaulted to IMAP. If you want to configure as IMAP then press and you are finished. If you wish to change to POP3 then click and continue with these instructions.
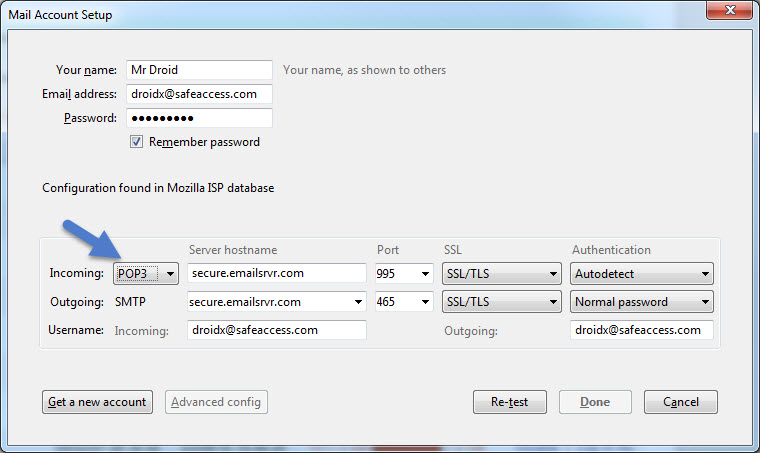
- Change the Incoming to . Then choose . Once the test is complete, choose . You are done except for the settings to remove mail from server after a specified amount of time (see instructions below).
Existing install configuration (POP3)
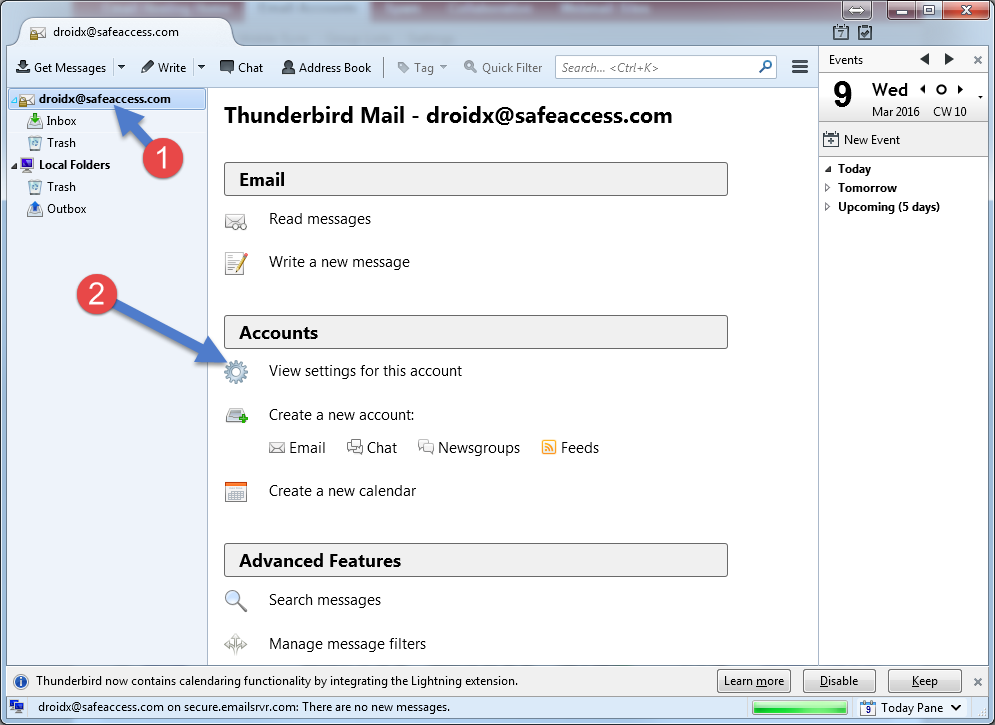
- From your main screen, click on the account to left, then on .
- Click on server settings and make sure your server settings are set according to the following;
Server Name: secure.emailsrvr.com
Port: 995
Username: your email address
Connection Security: SSL/TLS
Authentication Method: Normal Password

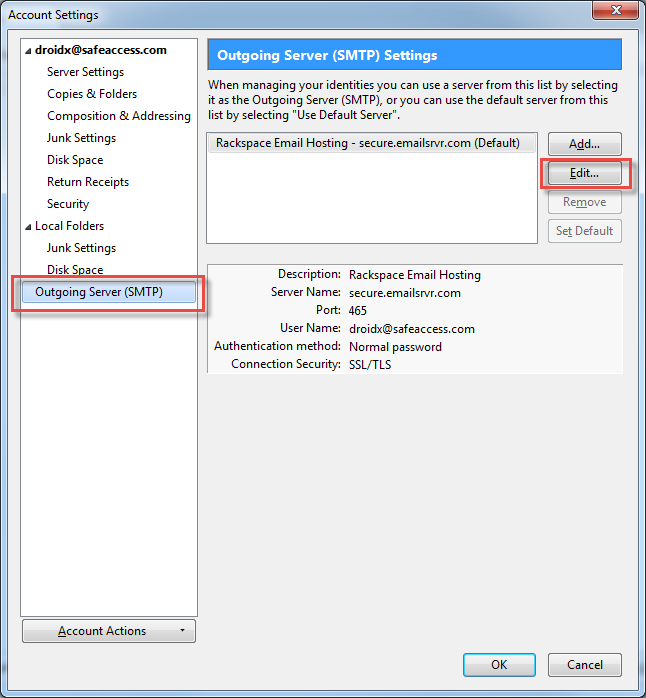
- Now check on your outgoing email settings. Choose on the left. You should see the following display and settings. If they are not correct, choose the button.
Existing install configuration (IMAP)
- From your main screen, click on the account to left, then on .
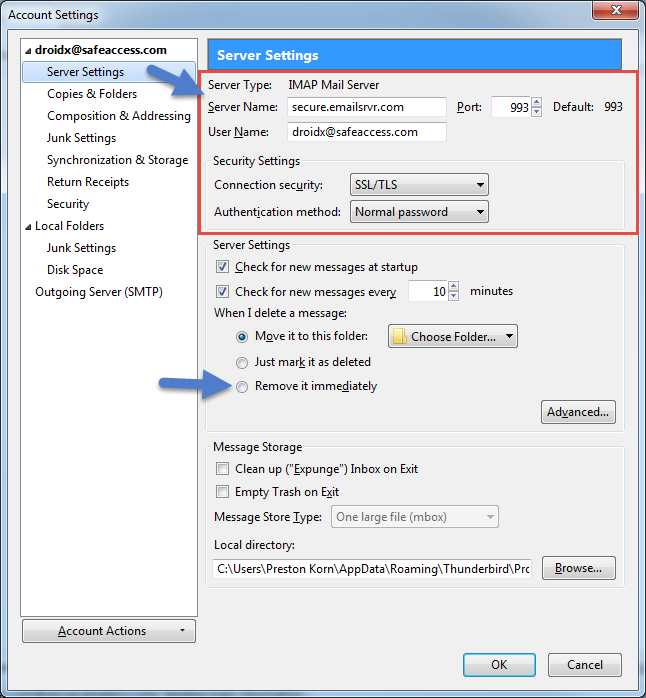
- Click on server settings and make sure your server settings are set according to the following;
Server Name: secure.emailsrvr.com
Port: 993
Username: your email address
Connection Security: SSL/TLS
Authentication Method: Normal Password
- Now check on your outgoing email settings. Choose on the left. You should see the following display and settings. If they are not correct, choose the button.
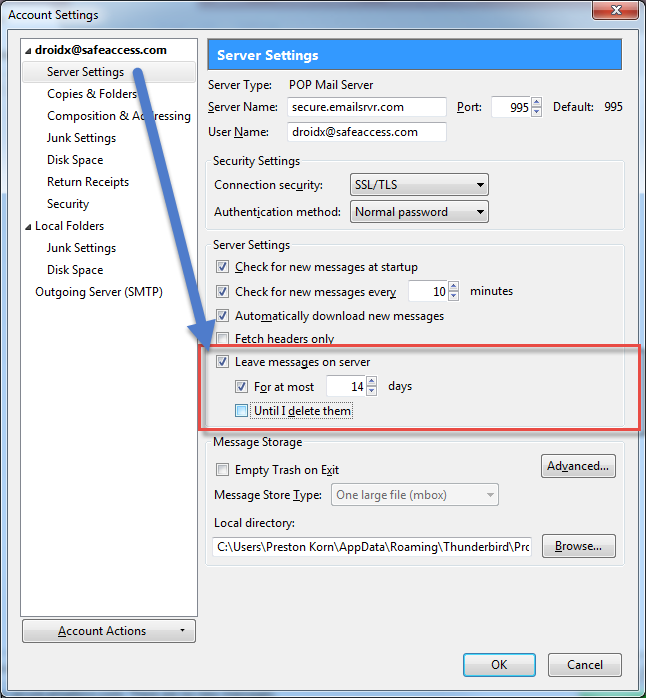
Modifying account to remove old messages off server.
- From your main screen, click on the account to left, then on .
- Click on on the left, then look for . Check this box, configure how many days of email you want left on the server, and uncheck the option . Please note, if your email is configured as IMAP you won't have this option. Also, if you check your email other places such as a smartphone, make sure you leave plenty of days on the server so the smartphone can read the messages as well.